This process is the same as V1 but with one big change, time tracking must be added from the + button.
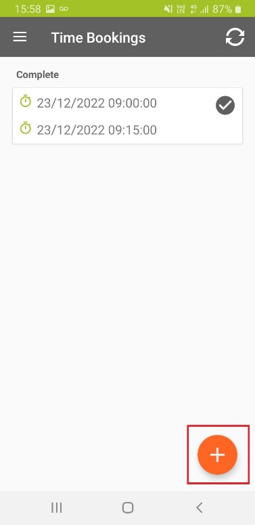
The data displayed before you do anything will be the time planned for you to attended (due to the nature of the business we don’t have planned time windows for PPMs/Services so a default e.g. 9:00-9:15 will be shown)
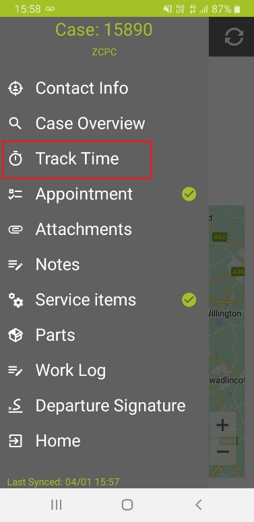
The 6 screenshots below show beginning to end of an appointment, you will be required to navigate through screens shown above to process completely.
- Select the Travel or work appointment and select time bookings.
- Select +
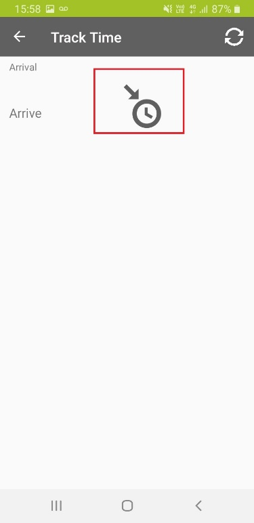
- Start your time
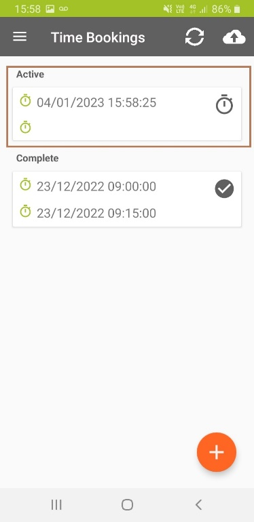
- When you’ve completed the work or travel select the ‘Active’ time bookings again
- End your time
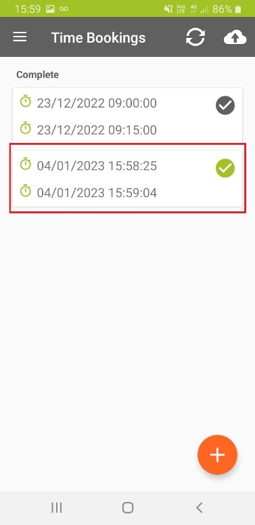
- Correct bookings should look like this, you should now sync.
 |  |  |  |  |  |
Was this article helpful?
That’s Great!
Thank you for your feedback
Sorry! We couldn't be helpful
Thank you for your feedback
Feedback sent
We appreciate your effort and will try to fix the article